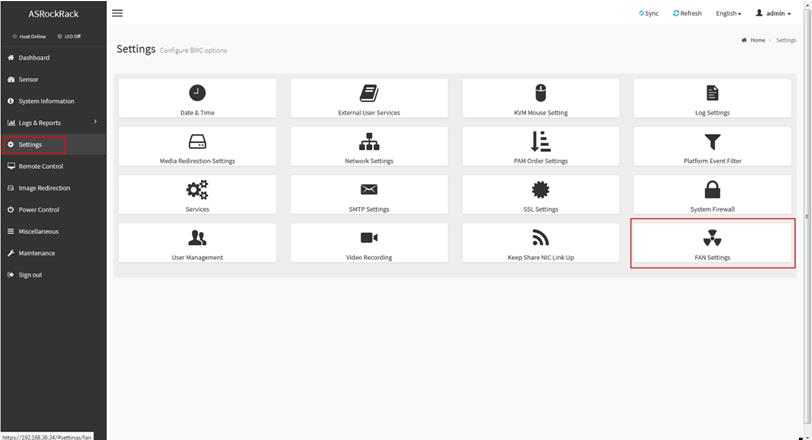
1. Login to IPMI webUI > Settings > FAN Settings
2. Chose Open Loop Control Table, then set your customize fan table and save.
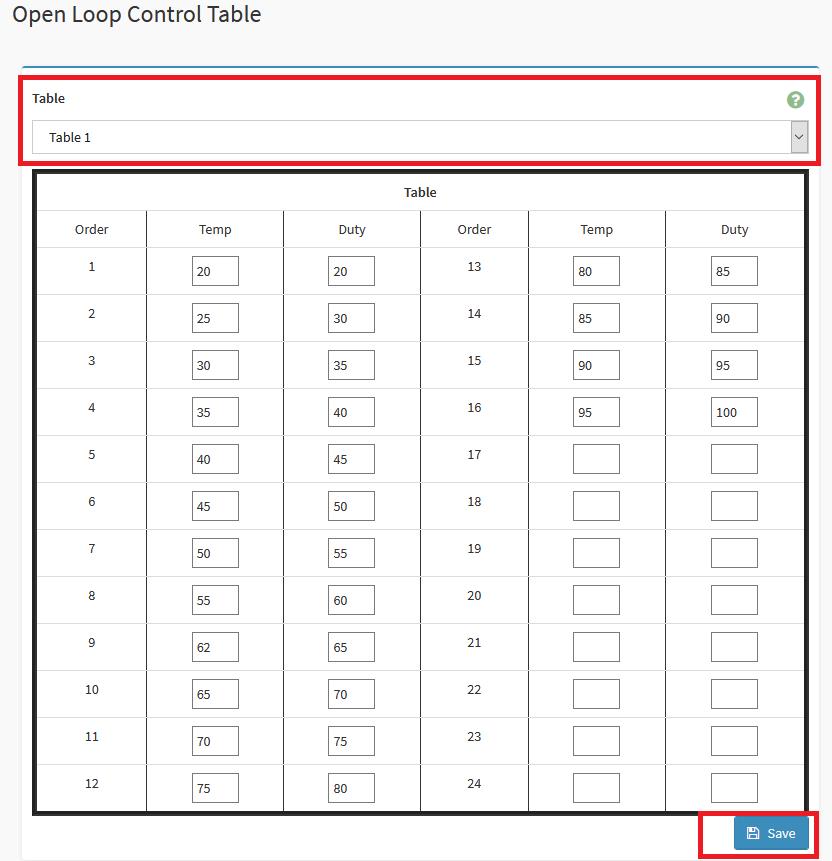
Sample Desc: Assuming the above Open Loop Fan Table is for CPU temperature sensor, when the CPU temperature reaches between 20~25 degrees, the fan duty will be at 30%. If CPU temperature reaches 57 degrees, fan duty will be at 60%.
3. Chose Close Loop Control Table, then set your customize fan table and save.
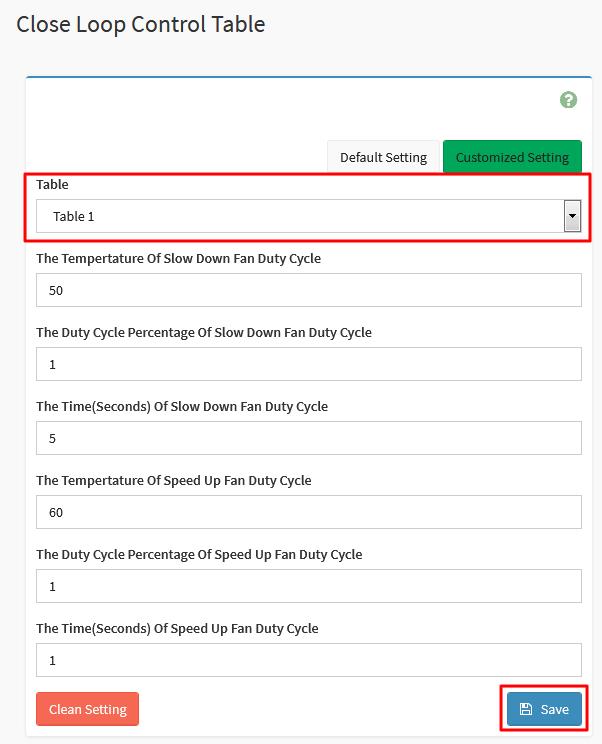
Sample Desc: Assuming above Close Loop Fan Table is for CPU temperature sensor, when the CPU temperature is higher than 60 degrees, the fan duty cycle will increase at a rate of 1% per second; when the CPU temperature is lower than 50 degrees, the fan duty cycle will decrease by 1% every 5 seconds.
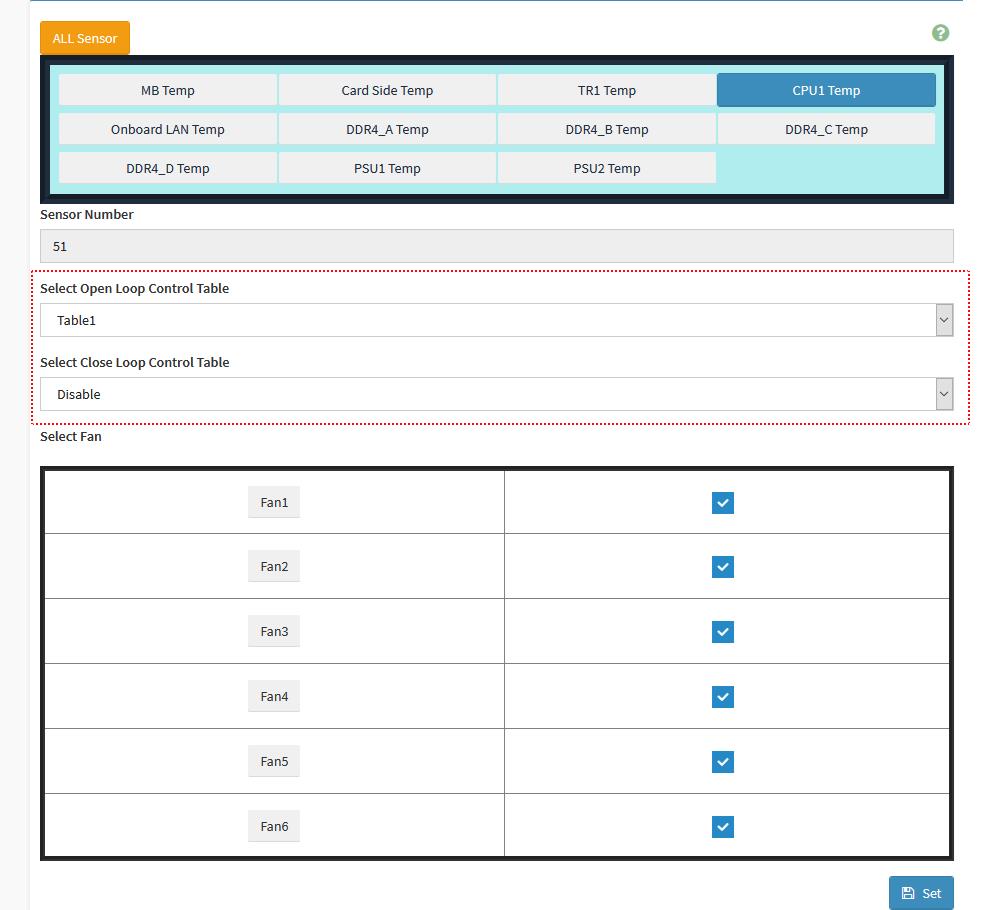
4. Go to IPMI webUI > Settings > FAN Settings > Temperature Sensor and Corresponding Fan Table
5. Chose the sensor and fan table you want to base on. And select the fan which will follow the rule.
For example, the following screenshot setting is
FAN1~6 will base on CPU1 temperature and follow to FAN table 1 which from the “Open Loop Control Table”.
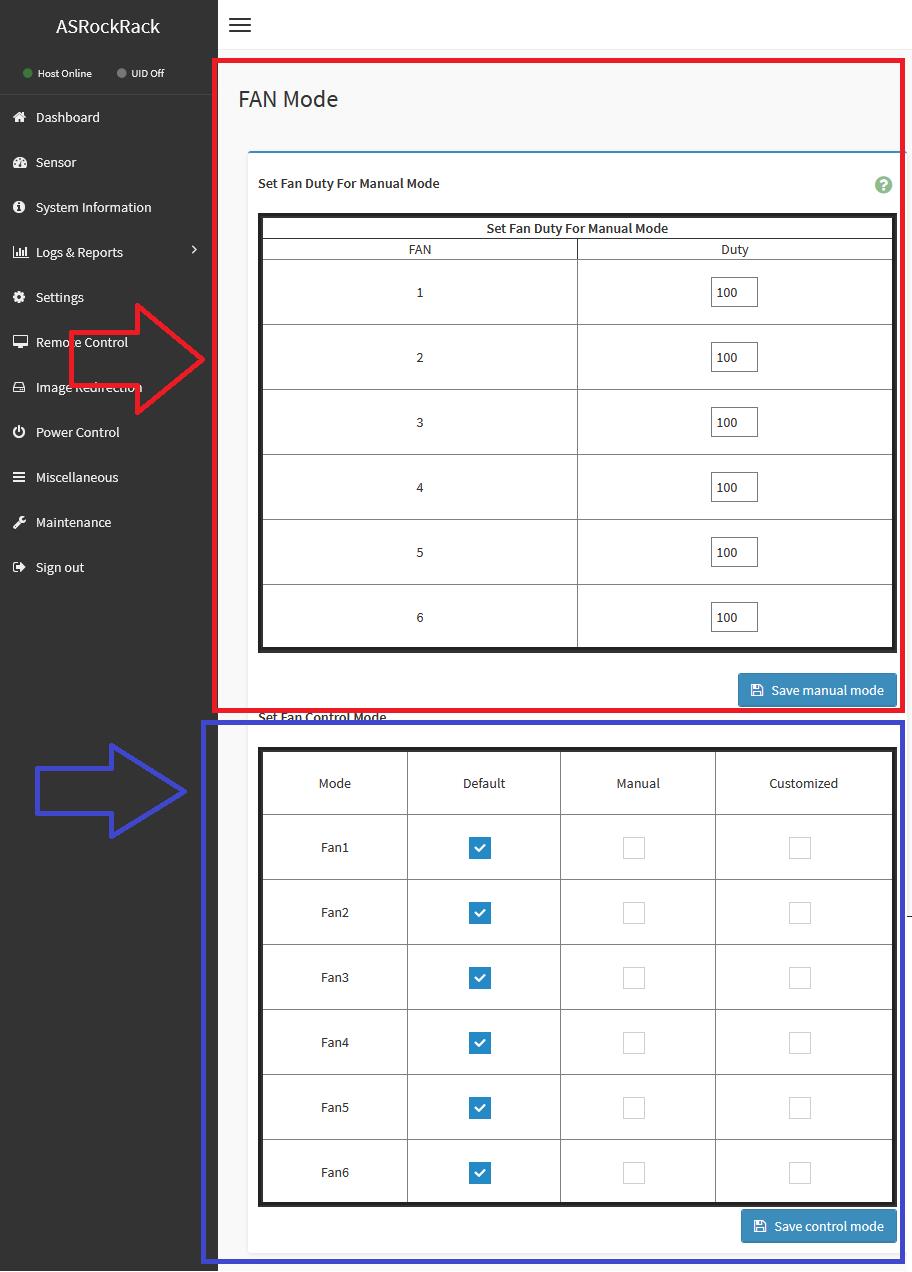
6. Go to IPMI webUI > Settings > FAN Settings > FAN Mode
7. Select different fan mode
Customized mode
If you want to let the fan to follow fan table
You will need to modify the fan you need to customized mode as following blue frame then save control mode
Manual mode
If you want to set fan to static mode, you need to set fan duty as following red frame first, then save manual mode
Second, select which fan you need in manual mode as following blue frame then save control mode